Writing into buffer~ and wavetable lookup
We have learned in Lesson 5 how to use buffer~ to read samples, to be used as a waveform for an oscillator. This process means simply to design an original waveform to create complex sounds, quite similar to use a rectangular wave oscillator or sawtooth wave to produce a sound more complex than the sinusoidal. Learning to use wavetables has been useful as we now understand the power of the buffer~ object and we could start using it to make more and richer sounds.
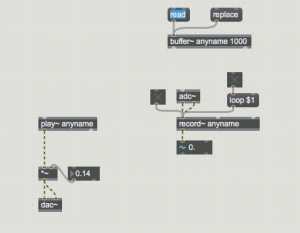
For the following explanations please create a buffer~, name it, and specify a size. This time, the size in samples/milliseconds would be good to be bigger than just 512/11.61. We would like to record and playback longer sounds, and a space of 512 samples would not be enough. In the example below, I set 1000 milliseconds for the size of the buffer~ named ‘anyname’, which equals to a size of 44100 samples.

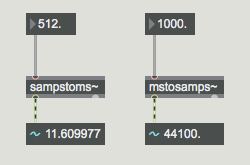
Incidentally, I would like to remind you here of these two very useful objects to calculate both ways the relationship samples-milliseconds/milliseconds-samples:
Play~
Create a new play~ object and type in it the name of the buffer you want it to read from, in the case of my example, you should type ‘anyname’. The buffer could be filled with a replace or read message, or by recording in it something with the microphone.
Make sure you understand the difference between sending a message ‘read’ or ‘replace’ to the buffer: ‘read’ will load a sample without changing the size of the buffer to the one of the sample; ‘replace’ would load the new sample and resize the buffer to the size of the new sample. That is, if I load a sound of 5000 milliseconds into a buffer of 1000, with ‘read’ I will only be able to see the first 1000 milliseconds, with ‘replace’ I will have a new buffer of 5000 ms.
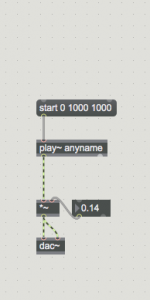
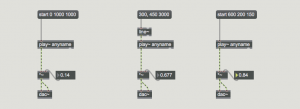
Play~ needs a message to playback the sound. This message should specify a ramp from a starting point in the buffer~, an ending point, and the duration of the playback, in the following format:
start [starting point] [ending point] [duration in ms]
An important aspect of musical performance is the relationship between pitch and speed of playback. It is discussed in more detail
here.
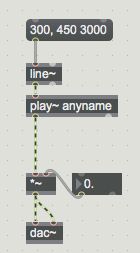
Another way to playback sounds with play~ is to use a ramp performed by the line~ object. Create a new object line~ and connect it with play. To this, you can simply send a standard ramp message in the format
[starting point], [ending point] [duration in ms]
as we have previously discussed
here, in Lesson 4.
Regardless of the method you want to use, with a ramp you can vary the speed of playback, the duration, and its direction, a set of operations that would allow you to create multiple sounds from, and transformations of the original sample.
Waveform~
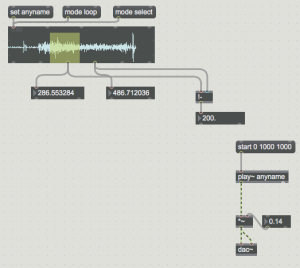
Using the third and fourth outlets of waveform, when in interactive mode ‘select’ or ‘loop’ (activated by a mode select or mode loop message), the values in milliseconds of the selection start and end are displayed.
You can also reverse-subtracting (using the !- object) the selection start from the selection end to find out the length of the selection.
Info~
This object is designed just to give extra info on the sample contained in the buffer. Mostly is used to get the total length of the file, but for prepared samples, can contain also metadata such as filename, loop markers, and channels information.
To finally practice with our sounds, we can choose several playback ramps, that playback the whole file or just portions of it, at different pitch and playback direction. The ramps can be triggered manually by mouse, or you can use some of the strategies learned in Lesson 1-5.
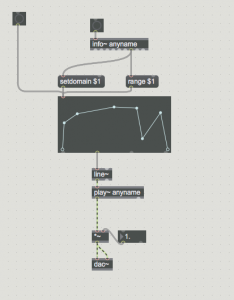
You could also use the function object to make the playback variable, as in the following advanced example:
Here I have used
line~ object in combination with
function object, setting the domain of the
function object to the length of the file but also the y-axis on the same length, using the message ‘range’. In this way, I could give to
line~ object the starting and ending point at different points in time, with a
delta time different, creating changes in pitch. To provide the length information I have used the
info~ object.
Groove~
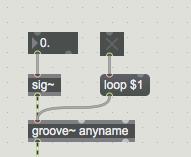
Create a new object and type in groove~. Once the object is created, leave a space after its name and type the name of the buffer~ you want it to read data from.
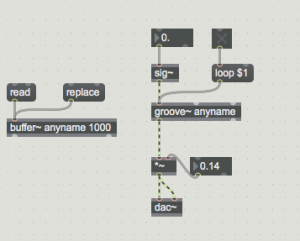
A groove~ object pointing to the buffer~ ‘anyname’
To operate, groove~ needs to be set on a playback speed. The usual values are 1, for playing back at the sample rate speed, 2 to play back twice as fast and 0.5 to play back half the sample rate. These settings will also
change the pitch accordingly.In order to receive these speed instructions, groove~ needs to receive them as a signal, not as a float or a message. Groove~ can still receive other messages or other non-signal data, but those will not be considered as playback speed instructions.
The Groove~ object, similarly to the play~ object, allows you to playback sounds reading data from a point to another in a buffer~, but its main features are the other two inlets for minimum and maximum loop settings, and the right outlet, which is the sync signal message.
In general, each of Max playback objects (such as play~, groove~, wave~, 2d.wave~, sfplay~) can playback sounds. Even play~ can be set to play in loop. The difference lies in the different musical application that each object affords. The objects have a design that suits certain tasks better than others because they have been created with a specific functionality. The specialty of groove~ object is to play loops.
A message could be sent to groove~’s main inlet (the left), in the format loop $1. The variable $1 can be set on 1 if loop is active, 0 if loop is off. The toggle object is a useful object to feed the variable with those two alternating values.
If set on loop 1, groove~ would play the whole buffer~ content and, once reached the end, it will start again.
One major feature of groove~, as I was saying earlier, is that we can set the range of the loop directly and dynamically, which opens up great musical possibilities. They can be fed with data dynamically by using the interactive display waveform~.
The third and fourth outlet of waveform~, that contain the loop selection information can be connected to the second and third inlet of groove~ respectively. See the red patcher cords in the next picture.
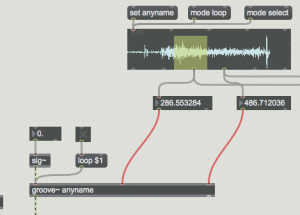
In red, the connection between the data coming from waveform~ object selection: the loop starting and ending point, useful information for sound playback with groove~
This system would allow you to change dynamically the loop that groove~ is currently looping. A number of interesting effects can be experimented, combining loop selection length and position with loop playback speed.
Another important feature of groove~ is the bottom right outlet. This provides a signal between 0-1, which gives the status of the playback from the beginning of the file (0) until the end (1). When groove~ is in action, the outlet is sending out signal data ramping from 0 to 1 accordingly to the speed and length of the selection played back. Soon this feature will become handy, to create automatic envelopes for removing clicks for example, and later on with granulation for creating the windowing for the sound grains.


